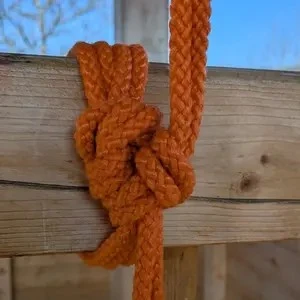
Somerville Bowline
It is one of the best knots to learn.
It starts off as a simple single columne tie.
A variation can be used in line if one end is already tied up.
And another variation can be used to make a quick double columne tie.
Pros: Easy to learn, very versetile, can be used as a quick release.
Cons: Very bulky, not the most visually appealing version.
Some good turorials are made by
The Dutchy ,
Crash restraints.
The quick version

Take the bite of the rope and pull it up behind the column.
Pull it slowly in one smooth motion.
Take your time to set the lenght, being precise saves time adjusting later.

Let the end fall down to start wrapping it.

Wrap the rope a second time around the column.
Four single ropes give egnouth contact area to be comfotable for most ties.
A third or fourth wrap can be added if more contact area is desired.

We start the quick bowline by putting a Turn in the long rope end.

The short end gets pushed through the loop of the long end.

Continue pushing the short end under the wraps.

And push the short end through the loop again.

Tighten the knot by pulling on both ends simultaniously.
Inline Bowline
The same considerations about number of contact area and tention apply as in the quick version.

We start with one end alredy tied.
This situation has the lower rope connected end and the upper rope is the loose end.

Start by coiling the tope around the column.
Leave some slack, we will pull the already connected end closer when pulling a loop.

Cross the loose end over both loops.

Pull the loose end underneath the loops.
It is now once around the loops.

Pull the loose end underneath the loops.
It is now once around the loops.
Grab the tied up rope end with your thumb and forefinger.

Turn the tied up rope around your finger to make a loop.
Make sure that the direction is correct.
You now have the free end in one hand and the tied up end pulled into a loop.

Push the free end through the loop.

Pull on both ends to pull the knot tight.

Start adding a larks head to lock it down.
Pull your fingers underneat the wraps and grab the long rope.

Pull it partially through to make a loop.

Push the end of your rope throught the loop.

Pull on the end to tighten the larks head.